Introduction

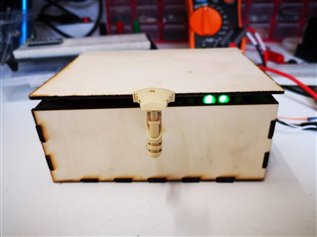
Above: the “toxic minion” say hello to the post readers. Don’t?
 ) when Cristina Ciocci from Ingegno Maker Space joined the crew: we launched the first Malem Arduino workshop to build a toy, just a useless box.
Proof of Concept and Design
- Make the project easy to assemble and understand by a class of kids, most of them at their first approach to Arduino;
- Make the project components replicable as a medium-difficult assembly kit and in the meantime, every box should have something original.
Proof of Concept

The basic idea of the useless box is focused on the Arduino board controlling a servo. The final version of the prototype, as well as the workshop kits, also included another couple of components; the sketch above shows the top box with a possible distribution of the components.
The most interesting useless boxes (you can find plenty of examples and projects on the Internet) are those that execute some complex task like there is something live inside. To do this, are always used two motors (or big servos) acting independently: one is dedicated to the arm movement and one to the box movement. Instead, I had to put two limitations: using a single micro servo to be powered directly by the Arduino board and keep a custom behavior, themed accordingly to the Malem Robotica context. The sketch below shows the mechanical idea I have worked around to reach the goal.

The curve of the arm should have two different action points; in practice, I solved the problem a bit differently but respecting this initial idea.


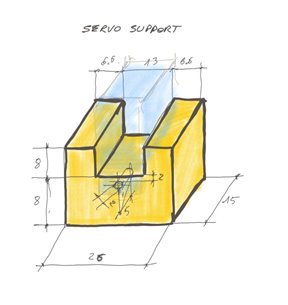
A simple 3D printed block elevates the micro servo to execute the entire movement cycle at the necessary height, accordingly with the pieces I used for the arm. In fact, one of the characteristics of the Malem Robotica Useless Box is… using pieces of robot toys. Koen provided me a bunch of parts I used to create six similar arms. The image below shows only a part of the selection of pieces I had available.

The Box Design
After some tests to find the smaller box dimensions where all the components can fit the box parts have been designed with the help of the online tool MakerCase then after the file has been saved in SVG format I have added the hole for the switch and laser cut the first prototype.

Above: the box components cut on plywood (3 and 4 mm) ready to be assembled.
The Circuit Design
As mentioned before, every box should be different but almost similar to be easy to create multiple sets. The first idea was adding LED of different colors in every box, then digging the toy pieces I found a number of heads coming from different monsters and some (this will make happy the Top Members ) tiny Minions. Thus I created a different lighting effect for every box, as shown in the image gallery below.


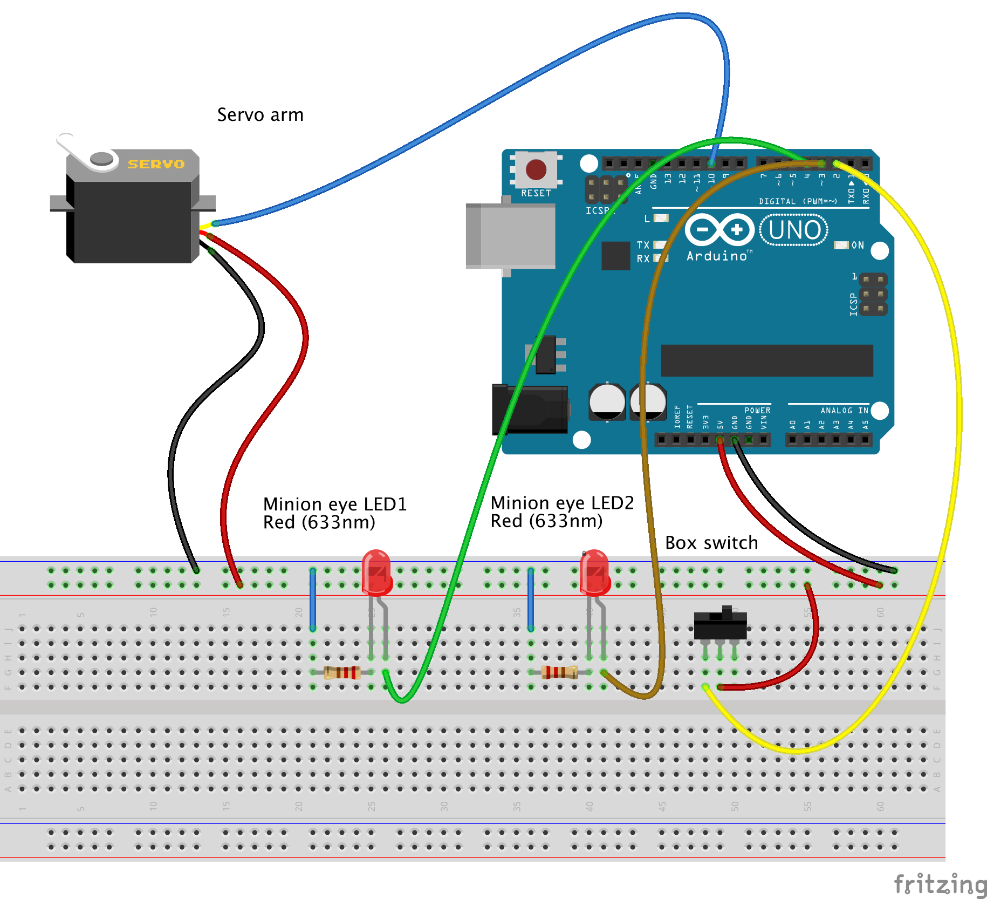
The image below shows the circuit created with Fritzing. All the design, Ftrizing circuit, and Arduino code are available on GitHub at https://github.com/alicemirror/UselessBox

Assembling the Parts
To be honest, assembling the parts had been nice while seeing the prototype coming to life but then building the other five replicas it was a bit boring. The entire process from the idea to the workshop with the kids was indeed a very interesting collaborative experience. The Elegoo’s kits were delivered the last minute Friday evening and during the afternoon and Friday night Cristina cut the boxes; until the prototype has not worked perfectly it was impossible for me releasing the final SVG files.

I avoid boring to show every detail of the assembly process with images as it is better to look at the making-of in the video below. Instead, point the attention on a last-minute problem I had to solve for sure. It was Friday night, less than 24 hrs from the workshop. The use of a micro servo allowed me to have the electronics working – including the two LEDs – powered by the Arduino 5V pin, and using 6 AA 1,5V battery pack; unfortunately, the servo arms were too weak to operate the switch. The lucky solution I found, in my opinion, added a touch of originality to the building; using six different shaped parts of the toys every switch has been customized with a small lever to reduce the force needed by the micro servo to change its position.


